Jual alat otomatis

Sabtu, 27 September 2014

SETTING WORDPRESS .htaccess NGINX

How to put wordpress .htaccess at nginx webserver ?

get your .htaccess permalinks ,and convert it to nginx style at http://winginx.com/en/htaccess

open sudo nano /etc/nginx/sites-enabled/yourdomain
find this line

# deny access to .htaccess files, if Apache's doument root
# concurs with nginx's one
#
location ~ /\.ht {
        #deny all; --> comment this
               #inject this line from the web http://winginx.com/en/htaccess
                if (!-e $request_filename){
                rewrite ^(.*)$ /index.php break;
                }
}

restart the nginx webserver 
sudo service nginx restart

==========================
setting permalink wordpress Nginx

in /etc/nginx/sites-enabled
choose domain configuration which you want to config

sudo nano domainname.com
put this line

  location / {
                # This is cool because no php is touched for static content. 
                # include the "?$args" part so non-default permalinks doesn't break when using query string
                try_files $uri $uri/ /index.php?$args; --> put this line into location /
        }
 

Sabtu, 06 September 2014

SETTING NGINX WITH WORDPRESS CAN AUTOMATIC INSTALL FTP

WordPress is the most popular CMS (content management system) used on the internet today. While many people use it because it is powerful and simple, sometimes people make a trade-off for convenience at the expense of security.
This is the case in how you choose to assign directory ownership and permissions, and how you choose to perform upgrades. There are a variety of different methods to do this. We will choose what we consider a relatively secure way of upgrading and installing themes and plugins.
In this guide, we assume that you have gone through your initial server setup. You will also need to install a LAMP stack on your VPS.
We will also assume that you have installed WordPress on Ubuntu 12.04. You can follow our guide on how to install WordPress on Ubuntu 12.04 here.
Once you have the user and required software, you can start following this guide.

Set Up Secure Updates with SSH

If you do not have key-based updates and installations configured, you will get a prompt for connection information whenever you attempt to do either of these tasks.
It will ask you to provide FTP credentials, such as a hostname, FTP username, and FTP password:
WordPress ftp credentials
FTP is an inherently insecure protocol, so we do not recommend you using it in most cases. We will be configuring our installation to use a secure alternative.

Changing Permissions

If you followed the guide on installing WordPress above, you will notice that you gave permission of the web directory to the Apache web user. This is a very quick way to get started, but can potentially be a security risk. In an ideal situation, you would separate the content owner from the web process. We will do this as part of our preparation for allowing SSH updates.
We will create a user called wp-user to own our WordPress installation.
sudo adduser wp-user
You will be asked a lot of question, including the password you want to set. We do not want to set a password, so press "ENTER" through all of the prompts, including the repeated password questions.
Next, change to the /var/www directory, where our WordPress files are being served.
cd /var/www
We will give our new user ownership over everything under this directory, changing it from the www-data Apache web user that we configured during installation.
sudo chown -R wp-user:wp-user /var/www/

Create SSH Keys for WordPress

We now need to create an SSH key pair for our WordPress user. Log into the WordPress user by issuing the following command:
sudo su - wp-user
We will create a key pair with the ssh-keygen command:
ssh-keygen -t rsa -b 4096
You will be asked where to store your keys and what to call them. Choose /home/wp-user/wp_rsa. You will also be asked to choose a passphrase. Press "ENTER" through the prompt to create a key without password authentication.
Exit out into your normal user account:
exit
We need to do some maintenance to get the permissions secure. We want to give the WordPress user ownership, but set the www-data group as the group owner. We then want to lock down the other access:
sudo chown wp-user:www-data /home/wp-user/wp_rsa*
sudo chmod 0640 /home/wp-user/wp_rsa*
You need to create the ~/.ssh directory and give it appropriate permissions and ownership so that the web process can log in.
sudo mkdir /home/wp-user/.ssh
sudo chown wp-user:wp-user /home/wp-user/.ssh/
sudo chmod 0700 /home/wp-user/.ssh/
Now, we can input the public key into our authorized keys file so that the user can log in using those credentials. Since we do not have this file already, we can simply copy the public key.
sudo cp /home/wp-user/wp_rsa.pub /home/wp-user/.ssh/authorized_keys
Again, we need to adjust the permissions and ownership of these files to ensure that they can be accessed, while remaining secure:
sudo chown wp-user:wp-user /home/wp-user/.ssh/authorized_keys
sudo chmod 0644 /home/wp-user/.ssh/authorized_keys
Since these keys will only be used for logging in from within the WordPress site, which is on the same computer, we can restrict the login to this server:
sudo nano /home/wp-user/.ssh/authorized_keys
At the very beginning of the file, before any of the other text, add the portion in red to restrict the key usage to the local computer:
from="127.0.0.1" ssh-rsa...
Save and close the file.

Adjust WordPress Configuration to Use Keys

Now, we can install the packages necessary for WordPress to authenticate SSH logins:
sudo apt-get update
sudo apt-get install php5-dev libssh2-1-dev libssh2-php
Now that we have the utilities, we can edit the configuration file and set the values that we configured.
sudo nano /var/www/wp-config.php
Towards the end of the file, add these lines:
define('FTP_PUBKEY','/home/wp-user/wp_rsa.pub');
define('FTP_PRIKEY','/home/wp-user/wp_rsa');
define('FTP_USER','wp-user');
define('FTP_PASS','');
define('FTP_HOST','127.0.0.1:22');
Save and close the file.
Now, we should restart Apache to take advantage of our new update procedures:
sudo service apache2 restart

Test the Results

Now, we can test to see if our configuration is correct. Log into your WordPress site as an administrator by visiting your site in a browser at the following URL:
your_domain.com/wp-admin
We can check that our settings are configured correctly by attempting to install a new theme. Click on "Appearance" and then "Themes".
WordPress Themes
At the top, click on "Install Themes":
WordPress install themes
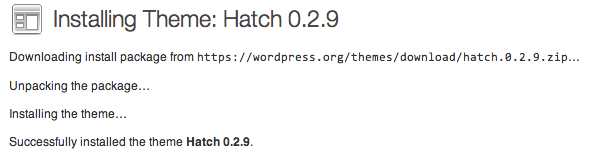
Search for a theme or click on the "Featured" themes. Click "Install" to install the theme on your site. It should successfully log in, download, and install your package using the key files you specified:
WordPress theme success
You can click on "Activate" to switch to the new theme and then click "visit site" to see the results.

Common Issues

There are some issues that you may run into if you've configured your SSH keys incorrectly.
One common error that you may see when trying to push a change through the web interface is:
Public and Private keys incorrect for user
This error is frustratingly unspecific. It can be caused for a variety of reasons, some of which are:
  • Improper permissions on the public key, private key, and the directories that contain them.
The web process needs to be able to read each of these files, so if the web-server group is the owner, then each file needs to have at least 640 permissions.
On the other hand, the ~.ssh directory only needs to be accessible to the user that will be logging in. This means the wp-user user in our example. The contents of the directory should be similarly owned by this user and not writable by anyone else.
  • Improper file ownership. These same keys need to be owned by the correct parties. Between owner and group-owner, this is often a mixture of the user being logged in and the web process user.
In our example, the wp-user owns both the private and public keys, while the www-data group is the group-owner. This allows us to associate them with the correct user while allowing the server to read the files.
  • Improper file formatting. If your public or private key has formatting issues, WordPress will reject the key and refuse to use it. The same goes for the~/.ssh/authorized_keys file.
The portion that you added to the authorized_keys file, from="127.0.0.1" ... should not exist in the public key. Even though SSH will consider it a valid file, WordPress will reject it as invalid before even sending the attempt to the SSH daemon.
Another common error during the process of updating or installing themes and plugins is:
Could not create directory...
This is usually an issue with incorrect web-directory ownership. If you are going to be updating the files with the wp-user account, the upload directories also need to be owned and accessible by this user.
This means that you need to give the files and folders within the /var/www directory to the wp-user account. If you followed the instructions above and are still having problems, make sure you passed the -R option to the chown command.
Another thing to check is that the upload directories have write permissions for the WordPress user. Change to the document root:
cd /var/www
If we check the permissions of the files in this folder, we should see write permissions for the owner (first column), but not for the second or third columns:
ls -l
total 180
-rw-r--r--  1 wp-user wp-user   177 Nov 18 15:21 index.html
-rw-r--r--  1 wp-user wp-user   418 Sep 24 20:18 index.php
-rw-r--r--  1 wp-user wp-user    20 Nov 18 15:24 info.php
-rw-r--r--  1 wp-user wp-user 19929 Jan 18  2013 license.txt
-rw-r--r--  1 wp-user wp-user  7128 Oct 23 16:08 readme.html
-rw-r--r--  1 wp-user wp-user  4892 Oct  4 10:12 wp-activate.php
drwxr-xr-x  9 wp-user wp-user  4096 Oct 29 16:08 wp-admin/
-rw-r--r--  1 wp-user wp-user   271 Jan  8  2012 wp-blog-header.php
-rw-r--r--  1 wp-user wp-user  4795 Sep  5 21:38 wp-comments-post.php
-rw-r--r--  1 wp-user wp-user  3350 Nov 19 12:23 wp-config.php
-rw-r--r--  1 wp-user wp-user  3177 Nov  1  2010 wp-config-sample.php
drwxr-xr-x  5 wp-user wp-user  4096 Nov 19 12:25 wp-content/
. . .
As you can see, the file permissions that read -rw-r--r-- and the directory permissions that read drwxr-xr-x indicate that the wp-user, who owns the files and directories, has write permissions and others do not.
A similar check within the wp-content directory, which contains themes, plugins, etc, will show us whether these directories are owned by and writeable by the wp-user user.
cd /var/www/wp-content
ls -l
total 16
-rw-r--r-- 1 wp-user wp-user   28 Jan  8  2012 index.php
drwxr-xr-x 3 wp-user wp-user 4096 Oct 29 16:08 plugins
drwxr-xr-x 6 wp-user wp-user 4096 Nov 19 13:10 themes
drwxr-xr-x 2 wp-user wp-user 4096 Nov 19 13:10 upgrade
These directories are correctly configured.

Conclusion

While WordPress is convenient and can be configured and managed relatively easily, it does not mean that security should not be a primary concern for your site.
Something as simple as updating your installation, which should be done immediately upon any security release, should be simple. It also should not be a procedure that forces you to use insecure protocols or set insecure directory permissions.
Securing your update procedure and correct directory permissions is one easy task that can prevent a rather large security concern.

INSTALL WORDPRESS WITH NGINX ON RASPBERRY/CUBIEBOARD

Wordpress is a free and open source website and blogging tool that uses php and MySQL. It was created in 2003 and has since then expanded to manage 22% of all the new websites created and has over 20,000 plugins to customize its functionality.

Step One—Prerequisites!

This tutorial covers installing Wordpress. Before you go through it, make sure your server is ready for Wordpress. You need root privileges (check out steps 3 and 4 for details):Initial Server Setup
You need to have nginx, MySQL, and PHP-FPM installed on your server: LEMP tutorial
Only once you have the user and required software should you proceed to install wordpress!

Step Two—Download WordPress

We can download Wordpress straight from their website:
wget http://wordpress.org/latest.tar.gz
This command will download the zipped wordpress package straight to your user's home directory. You can unzip it the the next line:
tar -xzvf latest.tar.gz 

Step Three—Create the WordPress Database and User

After we unzip the wordpress files, they will be in a directory called wordpress in the home directory on the virtual private server.
Now we need to switch gears for a moment and create a new MySQL directory for wordpress.
Go ahead and log into the MySQL Shell:
mysql -u root -p
Login using your MySQL root password, and then we need to create a wordpress database, a user in that database, and give that user a new password. Keep in mind that all MySQL commands must end with semi-colon.
First, let's make the database (I'm calling mine wordpress for simplicity's sake; feel free to give it whatever name you choose):
CREATE DATABASE wordpress;
Query OK, 1 row affected (0.00 sec)
Then we need to create the new user. You can replace the database, name, and password, with whatever you prefer:
CREATE USER wordpressuser@localhost;
Query OK, 0 rows affected (0.00 sec)
Set the password for your new user:
SET PASSWORD FOR wordpressuser@localhost= PASSWORD("password");
Query OK, 0 rows affected (0.00 sec)
Finish up by granting all privileges to the new user. Without this command, the wordpress installer will not be able to start up:
GRANT ALL PRIVILEGES ON wordpress.* TO wordpressuser@localhost IDENTIFIED BY 'password';
Query OK, 0 rows affected (0.00 sec)
Then refresh MySQL:
FLUSH PRIVILEGES;
Query OK, 0 rows affected (0.00 sec)
Exit out of the MySQL shell:
exit

Step Four—Setup the WordPress Configuration

The first step to is to copy the sample WordPress configuration file, located in the WordPress directory, into a new file which we will edit, creating a new usable WordPress config:
cp ~/wordpress/wp-config-sample.php ~/wordpress/wp-config.php
Then open the wordpress config:
sudo nano ~/wordpress/wp-config.php
Find the section that contains the field below and substitute in the correct name for your database, username, and password:
// ** MySQL settings - You can get this info from your web host ** //
/** The name of the database for WordPress */
define('DB_NAME', 'wordpress');

/** MySQL database username */
define('DB_USER', 'wordpressuser');

/** MySQL database password */
define('DB_PASSWORD', 'password');
Save and Exit.

Step Five—Copy the Files

We are almost done uploading Wordpress to the server. We need to create the directory where we will keep the wordpress files:
sudo mkdir -p /var/www
Transfer the unzipped WordPress files to the website's root directory.
sudo cp -r ~/wordpress/* /var/www
We can modify the permissions of /var/www to allow future automatic updating of Wordpress plugins and file editing with SFTP. If these steps aren't taken, you may get a "To perform the requested action, connection information is required" error message when attempting either task.
First, switch in to the web directory:
cd /var/www/
Give ownership of the directory to the nginx user, replacing the "username" with the name of your server user.
sudo chown www-data:www-data * -R 
sudo usermod -a -G www-data username

Step Six—Set Up Nginx Server Blocks

Now we need to set up the WordPress virtual host.
Create a new file for the for WordPress host, copying the format from the default configuration:
sudo cp /etc/nginx/sites-available/default /etc/nginx/sites-available/wordpress
Open the WordPress virtual host:
sudo nano /etc/nginx/sites-available/wordpress
The configuration should include the changes below (the details of the changes are under the config information):
server {
        listen   80;


        root /var/www;
        index index.php index.html index.htm;

        server_name 192.34.59.214;

        location / {
                try_files $uri $uri/ /index.php?q=$uri&$args;
        }

        error_page 404 /404.html;

        error_page 500 502 503 504 /50x.html;
        location = /50x.html {
              root /usr/share/nginx/www;
        }

        # pass the PHP scripts to FastCGI server listening on 127.0.0.1:9000
        location ~ \.php$ {
                try_files $uri =404;
                #fastcgi_pass 127.0.0.1:9000;
                # With php5-fpm:
                fastcgi_pass unix:/var/run/php5-fpm.sock;
                fastcgi_index index.php;
                include fastcgi_params;
                 }
        

}
Here are the details of the changes:
  • Change the root to /var/www/
  • Add index.php to the index line.
  • Change the server_name from local host to your domain name or IP address (replace the example.com in the configuration)
  • Change the "try_files $uri $uri/ /index.html;" line to "try_files $uri $uri/ /index.php?q=$uri&$args;" to enable Wordpress Permalinks with nginx
  • Uncomment the correct lines in “location ~ \.php$ {“ section
Save and Exit that file.

Step Seven—Activate the Server Block

Although all the configuration for worpress has been completed, we still need to activate the server block by creating a symbolic link:
sudo ln -s /etc/nginx/sites-available/wordpress /etc/nginx/sites-enabled/wordpress
Additionally, delete the default nginx server block.
sudo rm /etc/nginx/sites-enabled/default
Install php5-mysql:
sudo apt-get install php5-mysql
Then, as always, restart nginx and php-fpm:
sudo service nginx restart
sudo service php5-fpm restart

Step Eight—RESULTS: Access the WordPress Installation

Once that is all done, the wordpress online installation page is up and waiting for you:
Access the page by visiting your site's domain or IP address (eg. example.com/wp-admin/install.php) and fill out the short online form (it should look like this).
dont forget to install webcache plugin for wordpress (for faster performance which generate static html)

MASTER TO MASTER REPLICATION OF APACHE/MYSQL

In this article, I will show you how to create a redundant Apache/MySQL cluster. I personally used this on two Raspberry PI to had them in redundancy and have load-balanced traffic to networkgeekstuff.com handled by both. But this tutorial is not limited to Raspberry PI and can be applied to most linux based apache/MySQL systems. It will be a “Master-Master” setup so this means none of the two servers will be considered primary and/or secondary.
To also see how to do load-balancing on Mikrotik router, see previous article I made here.
Now lets start with introducing the topology, or lets say the two servers we will load-balance on. I have called them CAIN and ABEL. And no, there is no particular reason other than they are interesting and both are 4 characters short.

Step 1) Preparing the two servers

Create a local hostname/IP resolution in the /etc/hosts file on both servers like this:

Step 2) Generate SSH access public keys for automated access

Next, generate ssh.pub keys between the two system so that both systems can access each other over SSH without login. This will be used by synchronization system called “unison” later.
On server CAIN:
On server ABEL:

Step 3) Install INCRON and UNISON

UNISON is a two-way synchronization project that specifically targets the limits of RSYNC. When I started researching how to do synchronization of my two servers, I started playing with RSYNC immediatelly as an obvious choice just to find out that RSYNC is in no way a good choice for “master-master” synchronization because the side that always starts the synchronization to the remote side will always assume the local files have precedence. For example if you delete a file on one of the two systems, then depending on which system you start the RSYNC first the file still existing on the other is either deleted or replicated back. So definitely a problem.  UNISON on the other hand maintains the complete state information that includes deleted files so he knows that some file should be deleted on both systems regardless from where it is started. It also uses the same algorithms like RSYNC to only transfer differences so it is also very effective to synchronize changes quickly.
INCRON is a deamon very similar to the average cron, with the difference that INCRON can be configured to watch a directory for events like file creation, file deletion, file modification and many other. Once an event is detected, it can start a specific script on demand. We will use INCRON to watch our apache web directories for changes and trigger file synchronizations with unison. There is just one single drawback, it cannot watch recursively all sub directories.
On both servers install both INCRON and UNISON, if you use debian or raspbian:
You can also test the unison first by synchronizing your web directories first before making it automatic with unison. The command is simple, for example this is executed on abel towards cain:

Step 4) Create script for configuring UNISON

As mentioned, UNISON cannot watch all sub directories with a single configuration, so in order to enable synchronization of all possible directories being created/deleted, we will create a script that will always automatically configure UNISON with all sub directories of your web container. I personally use this script to only synchronize the dynamic wordpress /upload directory, not all
Put this script to a file on both servers:
In my case I created the script file under /home/testuser/generate_incrontab and made this file execute every night inside the normal cron job (google “crontab” for help on this very easy linux step).
The script uses hostname to automatically recognize if it it is run on abel or cain to configure the incrontab. This is one example of a single line it will generate and place into your incrontab:
Explanation, I hope you would like to read “man incrontab”, but in summary the line shown above generated by the script tells unison to wath the directory for any “CREATE”,”DELETE”,”CLOSE”,”MOVE_IN” event in the directory and will execute unison synchronizing the two exact directories. So whenever someone uploads a file to the uploads folder, it will get synchronized on the fly!

Step 5) Prepare MySQL for Master-Master replication

Ok, you have your web directory synchronized now, lets move to MySQL. A few words on theory, normal MySQL you probably have installed only can do replication from Master to Slave. So if you want only one of your server to be master for all MySQL operations, and the other server only kicking in as a backup, then this is enough for you. If you however want complete redundancy, you have to start installing MySQL cluster, that is a complete difference install package.  In this example, I will show you a nice little trick how you can make two MySQL servers doing both Master and Slave in both directions at the same time. In essence you can make the Master->Slave configuration so that for example our CAIN will be Master1/Slave2 and ABEL will be Slave1/Master2. They will replicated all changes to both instantly via network and with a little trick of auto indexing, there will be no collision even if write operations are done on both servers at the same time.
First, lets modify the mysql configuration files, usually stored at /etc/mysql/my.cfg. This is how to configure both systems, note the red parts are important to avoid collisions when writing to both masters at the same time to be as they are shown here, modify the log_bin for anything you want, binlog_do_db for your web specific database (if you use wordpress you should know the name of the database, or see wp-config.php in main directory) :
Cain: joe /etc/mysql/my.cfg
Abel: joe /etc/mysql/my.cfg
Now restart your MySQL daemon for the configuration to take effect with /etc/inid.d/mysql restart

Step 6) Synchronize the database manually for before continuing

To be 100% sure that you start your database dynamic replication correctly, I would like you to follow this super quick guide on how to backup a databse to file, move the file and load it to the other server.
First select the server that you believe has the most recent database version and get the database to a file with this commnad:
Abel:
Cain:

Step 7) Create Master(CAIN) to Slave(ABEL)

Now with the databases in the exact same initial state, we can create one of the servers as Master that will now be CAIN. On CAIN, create the replication username in the database.
Cain:
Abel:
To verify your slave status, use the following command on slave:
In the output, you can look for these parts in the table and both should be “Yes”.
            Slave_IO_Running: Yes
            Slave_SQL_Running: Yes
I also encourage you to make some small tests manually inside the database, you can maybe create a simple table and see if it has been replicated from CAIN to ABEL and so on. For example create a table on CAIN:mysql>create table testsync (id INT, text VARCHAR(50)); then on ABEL see if it was created with mysql>show tables; and then drop it again on CAIN with: mysql>drop table testsync;, if it is no longer again on ABEL, you have a working replication from CAIN to ABEL.

Step 8) Create reverse Master(ABEL) to Slave(CAIN) to actually create Master-Master replication

This is exactly what we have done in Step 7, only with ABEL being Master and CAIN being Slave. The autoindex parameters configured in my.cfg will make sure there is no conflict. When you now basically do the previous step in the oposite direction. You can also change the username of the replication if you wish, but I wanted to have the same.
On ABEL:
Now you should also see that the ABEL went to master status with show master status.
Now take the parameters from the previous table connect CAIN with this command and the parameters:
Again, you can verify the slave status in the show slave status command:
In the output, you can look for these parts in the table and both should be again “Yes”.
            Slave_IO_Running: Yes
            Slave_SQL_Running: Yes

Step 9) OPTIONAL: Paranoid prevention of MySQL de-synchronization with VRRP

Ok, despite the fact that the auto indexing works great, if you have a web/system that often creates or drops MySQL tables, then it might be useful to dynamically use only one server for database communication, and only when this fails, move to the other database. Let me show you how it looks right after finishing step 1 to step 8:

VRRP is a protocol that creates a single virtual IP in the network, that is shared by multiple servers (or routers), but only one server is actively using it. The one who is allowed to also use it is dynamically elected based on priorities on local network and is called Master. Lets imagine that we create new IP in LAN 192.168.10.135 that will be VRRP virtual IP. But only ABEL will be VRRP master and use it. When ABEL fails, CAIN will take-over the VRRP IP and will start handling traffic going to it dynamically. When ABEL recovers back to working state, it will again take over the VRRP IP handling and CAIN will be quiet again.
Then all you have to do is configure MySQL to be able to accept SQL interface on 192.168.10.135, create VRRP IPs on lan interfaces and lately tell your apache/PHP to use the VRRP IP as contact point for database instead of localhost. All I will show below as step by step.
First, this is a diagram how the VRRP system should technically work. Note that the point is that despite the MySQL replication is two-way, at any given time only the information flow (replication) if only going in one direction, so there is no way/risk to have de-synchronization happen in any SQL write operation imaginable.

And if something happens to ABEL, everything is redirected to CAIN as follows.

Steps to create this VRRP setup, you do not have to do much, simply :

Step 9a) Add the new VRRP

On both CAIN and ABEL add a new vrrp IP to /etc/hosts file:

Step 9b) Install VRRPd

On both CAIN and ABEL:
apt-get install vrrpd

Step 9c) Start VRRPd on the servers

CAIN:
ABEL:
Verification can be done by either pinging the virtual IP on any other machine on your LAN, alternatively you can look on who is master by using the ip -4 addr ls command, the router that became master will have the new IP address listed there as active IP.

Step 9d) Create a MySQL user with the privilege to access MySQL from external source

Step 9e) Configure your apache/PHP system to connect to MySQL on the external IP.

Well, to be honest, this point depends on what you are using, as I am using wordpress, I can only tell you how to do this in this particular system. In wordpress it is very simple. Open file wp-config.php and change this line:
to this line:
And that’s it, the settings take effect immediatelly and if you didn’t break something, you should have connection to your MySQL via VRRP IP already going over the external IP.

Summary

I hope you enjoyed the whole example because I absolutely love this setup! Maybe it is because I am a network guy who just built first practical cluster on a two Raspberry PI and enjoys that I have cluster that takes 3W in total. So yes, that is true.
In regards to the article, I think I covered all the things you need for recreating the cluster, I was a little limiting all the outputs, verifications and troubleshooting, but I didn’t believe them to be that hard and it would make this article around three times bigger for only small practical reason.

from : http://networkgeekstuff.com/networking/master-master-apache-mysql-synchronization-tutorial-example-config/